Next.js + TypeScript + VercelでJamstackなブログを作る その2 - meta/syntax highlight/RSS/Deploy
Posted at: 2020-10-17
先日書いたNext.js + TypeScript + VercelでJamstackなブログを作る その1 - 環境構築/記事の作成・表示 の続きです。
記事一覧ページの作成、metaデータの設定、シンタックスハイライト・TeXの表示、RSS・sitemapの設定、Deployなどについて書いていきます。
記事一覧ページを作る
TOPページに記事の一覧を表示していきます。
記事は公開順に表示したいのでまずは記事ごとに公開日を設定していきます。
---
id: 'bocchan'
title: '坊っちゃん'
published: '2020-10-13'
---

...
次に表示記事一覧の情報を取得して表示する部分です。
...

type MatterResult = {
  content: string
  data: {
    id: string
    title: string
    published: string
  }
}

export type Post = {
  content: string
  id: string
  title: string
  published: string
}

...

// publishedでソートされた記事データを取得
export function getSortedPostsData() {
  const fileNames = fs.readdirSync(POSTS_DIRECTORIES)
  const postsData = fileNames.map(fileName => {
    const fullPath = path.join(POSTS_DIRECTORIES, fileName)
    const fileContent = fs.readFileSync(fullPath, 'utf8')
    const matterResult = matter(fileContent)
    return matterResult.data as MatterResult['data']
  })
  return postsData.sort((a, b) => {
    if (a.published < b.published) {
      return 1
    } else {
      return -1
    }
  })
}
import { InferGetStaticPropsType, GetStaticProps } from 'next'
import Link from 'next/link'
import { getSortedPostsData } from '@/lib/posts'

import styles from './index.module.css'

export const getStaticProps: GetStaticProps<{
  posts: ReturnType<typeof getSortedPostsData>
}> = async () => {
  const posts = await getSortedPostsData()
  return { props: { posts } }
}

const Index = ({ posts }: InferGetStaticPropsType<typeof getStaticProps>) => {
  return (
    <>
      <h1 className={styles.heading}>Awesome BLOG</h1>
      <div>
        {posts.map(post => (
          <article key={post.id}>
            <Link href="/posts/[id]" as={`/posts/${post.id}`}>
              <a>
                <h1>{post.title}</h1>
              </a>
            </Link>
          </article>
        ))}
      </div>
    </>
  )
}

export default Index
これでpublished順になった記事へのリンクがTOPページに表示されます。
Link部分は普通のaタグとhrefを使用してもリンクは可能ですが、そうするとSPAではなく遷移時にページの読み込みを行うようになります。Linkを使用することでrouterを使用したページ遷移になりますので通常はこちらの方が良いでしょう。
記事ファイルの読み込み部分をリファクタリング
このままでも正しく動いてはいますが、ID_FILENAME_MAPとgetSortedPostsDataでそれぞれ全ファイルの読み込み処理が記述されているのは無駄ですし、記事一覧にページングやカテゴリごとの一覧ページができた場合何度も全ファイルの読み込み直しが発生してしまいそうです。
記事ファイルは最初に全て読み込んでしまい、ページのレンダリング時にはそこから情報を取ってくるように変更してみます。
...

const ALL_POSTS = (() => {
  const fileNames = fs.readdirSync(POSTS_DIRECTORIES)
  return fileNames.map(fileName => {
    const fullPath = path.join(POSTS_DIRECTORIES, fileName)
    const fileContent = fs.readFileSync(fullPath, 'utf8')
    const matterResult = matter(fileContent)
    const matterResultData = matterResult.data as MatterResult['data']
    return {
      content: matterResult.content,
      ...matterResultData,
      fileName,
    }
  })
})()

const ID_FILENAME_MAP = (() => {
  const map = new Map()
  ALL_POSTS.forEach(post => {
    map.set(post.id, post.fileName.replace(/\.md$/, ''))
  })
  return map
})()

// 全てのpostのid一覧を取得
export function getAllPostIds() {
  return Array.from(ID_FILENAME_MAP.keys())
}

export function getSortedPostsData() {
  return ALL_POSTS.sort((a, b) => {
    if (a.published < b.published) {
      return 1
    } else {
      return -1
    }
  })
}

// idからpostを取得する
export async function getPostData(id: string): Promise<Post> {
  const post = ALL_POSTS.find(post => id === post.id) as Post

  const processedContent = await unified()
    .use(markdown)
    .use(remark2rehype)
    .use(stringify)
    .process(post.content)
  const content = processedContent.toString()

  return {
    ...post,
    content,
  }
}
問題なく動いているようです。
記事内の表示を調整する
技術ブログを制作する場合は記事内にソースコードや数式を記述する場合も多いかと思いますのでコードにsyntax highlightを効かせたり数式をTeXで表示させたりといった機能を追加していきます。
まずは必要なモジュールのインストール。
$ npm i remark-math rehype-raw rehype-katex rehype-highlight
次に記事の変換部分の処理を変更します。
...

import highlight from 'rehype-highlight'
import math from 'remark-math'
import katex from 'rehype-katex'
import raw from 'rehype-raw'

...

// idからpostを取得する
export async function getPostData(id: string): Promise<Post> {
  const post = ALL_POSTS.find(post => id === post.id) as Post

  const processedContent = await unified()
    .use(markdown)
    .use(math)
    .use(remark2rehype, { allowDangerousHtml: true })
    .use(raw)
    .use(highlight)
    .use(katex)
    .use(stringify)
    .process(post.content)
  const content = processedContent.toString()

  return {
    ...post,
    content,
  }
}
CSSも読み込みます。
...

import 'highlight.js/styles/ocean.css'
import 'katex/dist/katex.min.css'

...
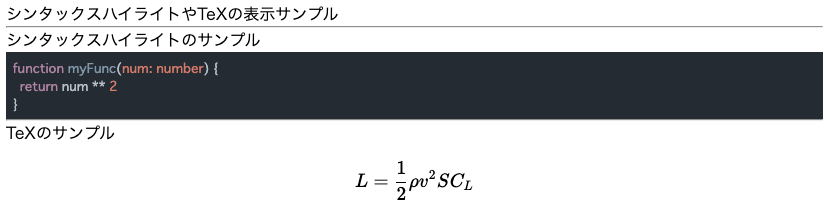
表示を確認するための記事を追加します。
---
id: 'syntax'
title: 'シンタックスハイライトやTeXの表示サンプル'
published: '2020-10-15'
---

---

## シンタックスハイライトのサンプル

```typescript
function myFunc(num: number) {
  return num ** 2
}
```

---

## TeXのサンプル

$$
L = \frac{1}{2} \rho v^2 S C_L
$$
これで記事ページを表示するとシンタックスハイライトなどが有効になっていることを確認できます。(記事ページのstyle調整などをしていないので見た目はひどいですが。。。)
また、Markdown変換時のallowDangerousHtml: trueと.use(raw)を追加することで記事内で直接htmlタグを使用することができるようにしています。
...

---

<p style="font-size: 24px; font-weight: bold; color: red;">inline HTMLのサンプル</p>

metaデータ
各ページのmetaを設定していきます。
Next.jsでmetaデータなどを設定するには組み込みコンポーネントであるHeadを使います。Head内に記述した内容は<head></head>内に展開されます。
...

import Head from 'next/head'

...

const Index = ({ posts }: InferGetStaticPropsType<typeof getStaticProps>) => {
  return (
    <>
      <Head>
        <meta name="og:title" content="Awesome BLOG" />
        <title>Awesome BLOG</title>
      </Head>

      ...

    </>
  )
}

export default Index
...

import Head from 'next/head'

...

const PostPage = ({ title, content }: InferGetStaticPropsType<typeof getStaticProps>) => {
  return (
    <>
      <Head>
        <meta name="og:title" content={`${title} - Awesome BLOG`} />
        <title>{title} - Awesome BLOG</title>
      </Head>

      ...

    </>
  )
}

export default PostPage
faviconのようにサイト内の全ページ共通で使うようなものはカスタムドキュメントを使います。
/src/pages/_document.tsxというファイルを配置することで、全ページで使用する雛形をoverrideすることができます。
import Document, { Head, Main, NextScript, Html } from 'next/document'

class MyDocument extends Document {
  render() {
    return (
      <Html>
        <Head>
          <link rel="icon" href="/my-favicon.ico" />
        </Head>
        <body>
          <Main />
          <NextScript />
        </body>
      </Html>
    )
  }
}

export default MyDocument
head内の記述をまとめたコンポーネントを作る
サンプルではtitleとog:titleのみ設定していますが、実際にはほかのOGP設定やTwitter関連の設定、canonicalなど設定が必要な項目が多くなり、全ページで記述していくのは面倒なのでコンポーネントにまとめてしまうのが良いでしょう。
import Head from 'next/head'

const SITE_NAME = 'Awesome BLOG'

const Meta = ({ title = '' }) => {
  const _title = title ? `${title} - ${SITE_NAME}` : SITE_NAME
  return (
    <Head>
      <meta name="og:title" content={_title} />
      <title>{_title}</title>
    </Head>
  )
}

export default Meta
...

import Meta from '@/components/Meta'

...

const Index = ({ posts }: InferGetStaticPropsType<typeof getStaticProps>) => {
  return (
    <>
      <Meta />

      ...

    </>
  )
}

export default Index
...

import Meta from '@/components/Meta'

...

const PostPage = ({ title, content }: InferGetStaticPropsType<typeof getStaticProps>) => {
  return (
    <>
      <Meta title={title} />

      ...

    </>
  )
}

export default PostPage
metaタグなどはHead要素の直接の子として記述する必要があります。
つまり、以下のような記述は正しく挙動しません。
...

<>
  <meta name="og:title" content={_title} />
  <title>{_title}</title>
</>

...
...

<Head>
  <Meta />
</Head>

...
RSS & sitemap
RSSおよびsitemapの設定をしていきます。
実装は RSS Feeds in a nextjs site | Logan's Blog を参考にさせていただきました。
RSS
必要なモジュールをインストールします。
$ npm i rss @types/rss
HOST_NAMEを解決するために.envファイルを作成します。
NEXT_PUBLIC_HOST_NAME=http://localhost:3000
.env.production.local はbuild時に読み込まれるenvファイルです。確認用にlocalhostを指定しています。
envファイル内の変数名はNEXT_PUBLIC_を接頭辞としてつけることでbundle時に変数名が解決され、ブラウザから値を読み取れるようになります。今回はブラウザからは使用しませんがbundle時に解決されている必要があるため接頭辞をつけています。
rssファイルを作成するためのファイルを作成します。
import fs from 'fs'
import RSS from 'rss'
import { getSortedPostsData } from '@/lib/posts'

const HOST_NAME = process.env.NEXT_PUBLIC_HOST_NAME

if (!HOST_NAME) {
  throw new Error("host name couldn't resolved.")
}

const generate = () => {
  const feed = new RSS({
    title: 'Awesome BLOG',
    site_url: HOST_NAME,
    feed_url: `${HOST_NAME}/feed.xml`,
  })

  const postsData = getSortedPostsData()

  postsData.map(post => {
    feed.item({
      title: post.title,
      description: 'dummy',
      guid: post.id,
      url: `${HOST_NAME}/posts/${post.id}`,
      date: new Date(post.published).toString(),
      author: 'zenpachi',
    })
  })

  const rss = feed.xml({ indent: true })
  fs.writeFileSync('./.next/static/feed.xml', rss)
}

generate()
全記事データをimportし、rssモジュールを使ってRSS用のデータを作成します。
最後には/.next/static/feed.xmlとしてデータを書き出すようになっています。
続いてnext.config.jsonファイルの設定です。
Next.jsではnext.config.jsonに設定を記述し、プロジェクトのルートに配置することで動作をカスタムすることができます。
module.exports = {
  target: 'serverless',
  async rewrites() {
    return [
      {
        source: '/feed.xml',
        destination: '/_next/static/feed.xml',
      },
    ]
  },
  webpack: (config, { isServer, dev }) => {
    if (isServer && !dev) {
      const originalEntry = config.entry
      config.entry = async () => {
        const entries = { ...(await originalEntry()) }
        entries['./scripts/generate-rss'] = './scripts/generate-rss.ts'
        return entries
      }
    }

    return config
  },
}
rewriteskeyはユーザからのrequestを別のパスへマップする設定を記述します。
今回の設定では最終的にfeed.xmlが配置されるのが/_next/static/feed.xmlとなるため、/feed.xmlへのリクエストをマップします。
webpackkeyではビルドされるファイルのentryを追加しています。先ほど作ったgenerate-rss.tsをgenerate-rss.jsとして吐き出します。
最後にbuildスクリプトを修正します。
{
  ...
  "scripts": {
    "dev": "next dev",
    "build": "next build && npm run build:rss",
    "build:rss": "node ./.next/serverless/scripts/generate-rss.js",
    "start": "next start"
  },
  ...
}
next buildを行なった後に、ビルドされたgenerate-rss.jsを実行します。これでfeed.xmlが作成されます。
$ npm run buildを実行すると/.next/static/feed.xmlファイルが作成されていることを確認します。
sitemap
同様にsitemapも作成します。方針はRSSと同じなので詳細は省略します。
$ npm i nextjs-sitemap-generator
import sitemap from 'nextjs-sitemap-generator'

const HOST_NAME = process.env.NEXT_PUBLIC_HOST_NAME

if (!HOST_NAME) {
  throw new Error("host name couldn't resolved.")
}

const generate = async () => {
  await Promise.resolve(
    sitemap({
      baseUrl: HOST_NAME,
      ignoredExtensions: ['js', 'json', 'map'],
      ignoredPaths: ['index'],
      pagesDirectory: './.next/serverless/pages',
      targetDirectory: './.next/static/',
      extraPaths: [''],
    }),
  )
}

generate()
module.exports = {
  target: 'serverless',
  async rewrites() {
    return [
      {
        source: '/feed.xml',
        destination: '/_next/static/feed.xml',
      },
      {
        source: '/sitemap.xml',
        destination: '/_next/static/sitemap.xml',
      },
    ]
  },
  webpack: (config, { isServer, dev }) => {
    if (isServer && !dev) {
      const originalEntry = config.entry
      config.entry = async () => {
        const entries = { ...(await originalEntry()) }
        entries['./scripts/generate-rss'] = './scripts/generate-rss.ts'
        entries['./scripts/generate-sitemap'] = './scripts/generate-sitemap.ts'
        return entries
      }
    }

    return config
  },
}
{
  ...
  "scripts": {
    "dev": "next dev",
    "build": "next build && npm run build:rss && npm run build:sitemap",
    "build:rss": "node ./.next/serverless/scripts/generate-rss.js",
    "build:sitemap": "node ./.next/serverless/scripts/generate-sitemap.js",
    "start": "next start"
  },
  ...
}
これでsitemap.xmlも生成されることを確認できました。
注意点として、今回はVercelにホスティングする想定なのでnext.config.jsonのrewriteが効きますが、next exportを使用して静的ファイルを別のサーバにhostingする場合などは効きません。そのため feed.xmlやsitemap.xmlをプロジェクトルート直下に配置する必要があります。
Deploy
まだまだブログとして作りこむ必要があるところはたくさんありますが、ひとまず最低限の要素は揃ったためDeployを行います。すでに何度か書いていますが今回はVercelをhostingサービスとして利用します。
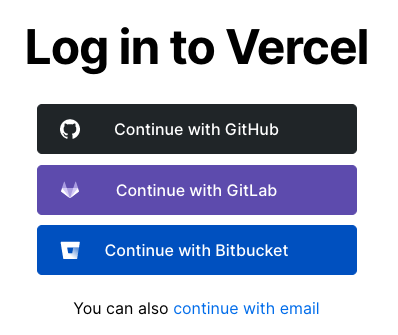
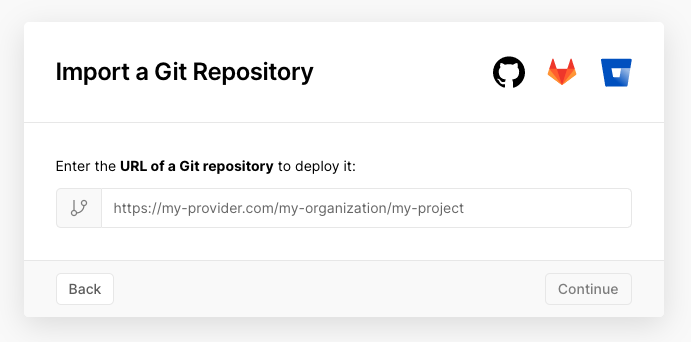
まずはGithubアカウントでVercelにログインします。
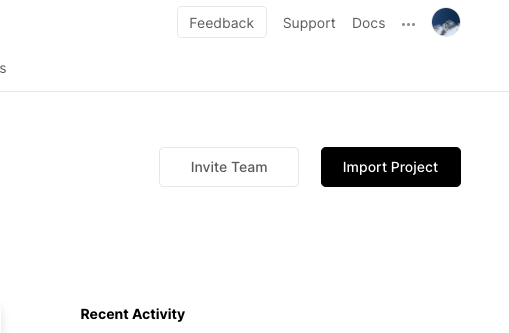
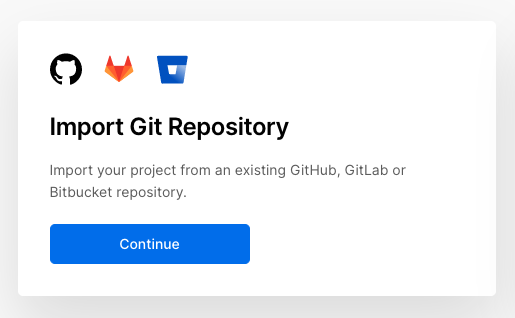
Import Project > Import Git Repository と進み、リポジトリのURLを入力
PROJECT NAME と FRAMEWORK PRESET を確認してから Deploy をクリック
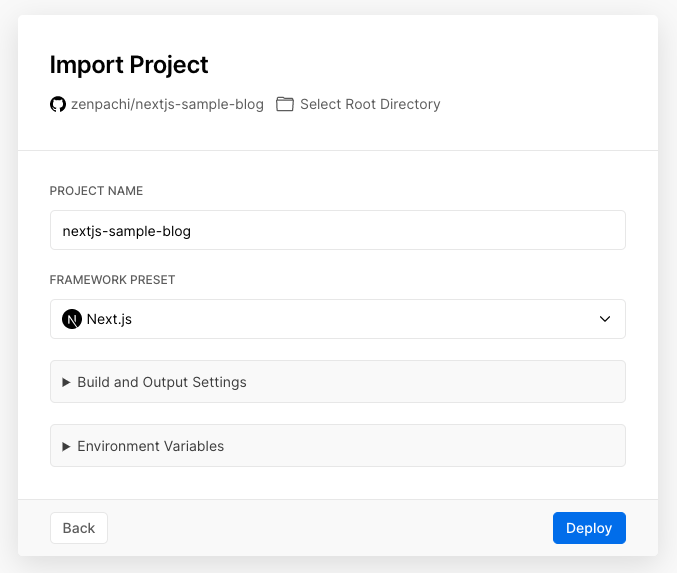
これだけでGithubのmasterブランチが自動的にDeployされます。とても簡単ですね。
しかしこのままだとDeploy中にエラーが出てしまいます。

RSS/sitemapを生成する際に使用するHOST_NAMEはローカルのenvファイルにしか記述していないためDeploy時に解決できていませんので、こちらを設定します。
Vercelが割り当てるドメインの確認をします。
Projects > <YOUR PROJECT NAME> > Settings > Domains
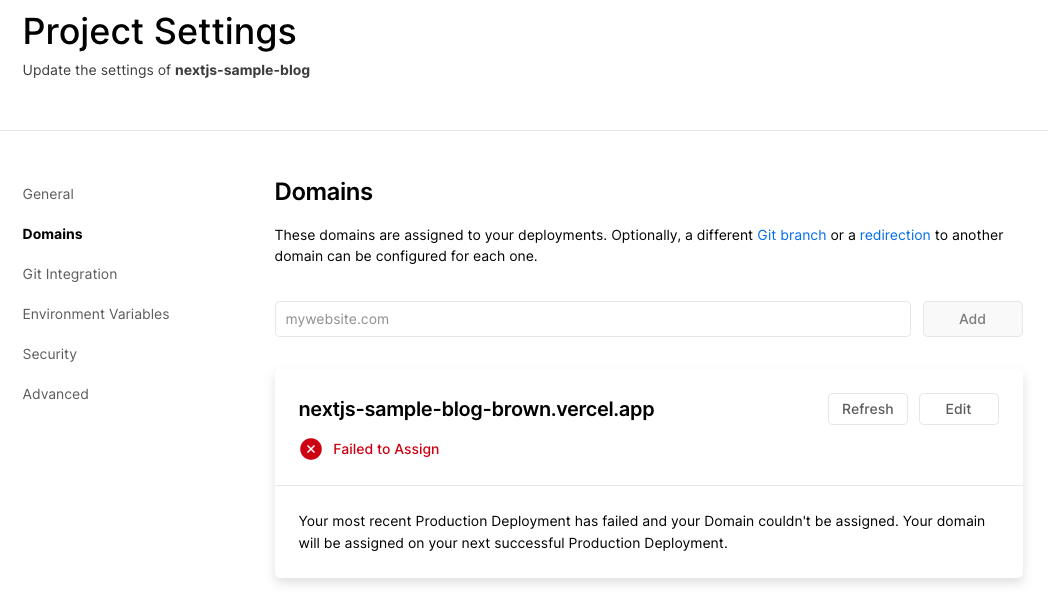
この nextjs-sample-blog-brown.vercel.app が割り当てられるドメインになりますので、こちらをHOST_NAMEに使用します。
Projects > <YOUR PROJECT NAME> > Settings > Environment Variables から設定します。
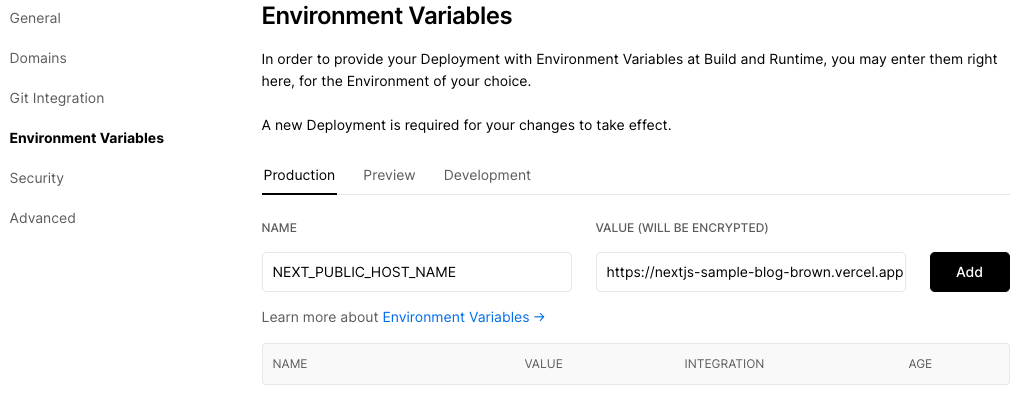
Addを押せば設定完了です。
Projects > <YOUR PROJECT NAME> > Deployments から先ほど失敗したDeoployを選択し、Redeployを押してしばらく待ちます。
今度はbuildに成功し、無事Deployされたようです。
https://nextjs-sample-blog-brown.vercel.app にアクセスするとブログが表示されます🎉
感想
- Next.jsのtutorialがわかりやすいのとexampleが豊富なのでシンプルな開発であればあまり詰まることもなくサクサクいける
- 認証機能とかが入ってくるともう少し複雑になるのでそのあたりの開発体験がどうなるかは引き続き試しておきたい
- VercelのDeployめちゃくちゃ楽
- 思っていたより長い記事なりましたがどなたかの参考になれば嬉しいです